Very much enjoyed Bakemonogatari, though I've only finished the first season. It was weird and occasionally, um, leery, but generally very smart and interesting.
Well, a friend asked me to maybe teach her how to slice the background out of an image so you have a transparent-backed render. I figured, hell, why not just make it a thing for the blog in general? She can't be the only person who might want to do this.
For this tutorial, we will be using The GIMP, a free image-editing program with a steep learning curve but about as much potential power as Photoshop.
I will be listening to the Bakemonogatari, Kill La Kill, and Ghost in the Shell Stand Alone Complex soundtracks, plus CHVRCHES' album. Those are not required but are recommended.
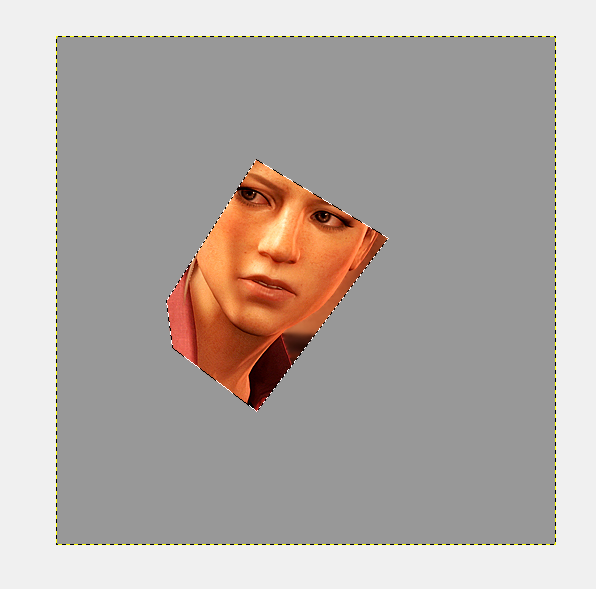
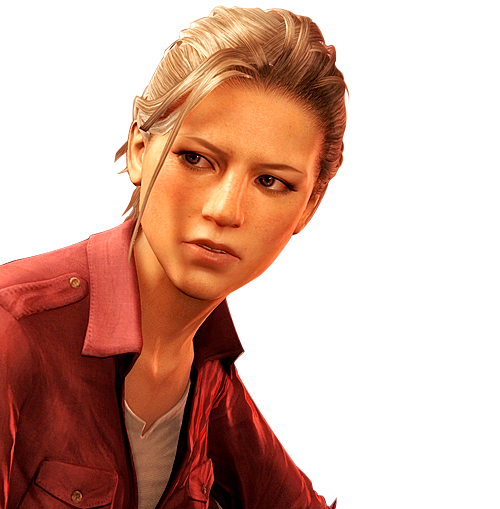
For our purposes today, I will be extracting the background out from behind the beautiful and talented Elena Fisher, because she's an awesome character and can always use some more love.
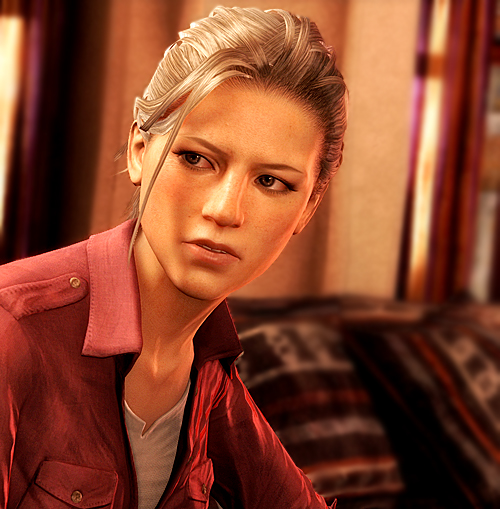
Looking pretty good there Elena. Thank you to Google Image Search for this. Also thanks to Naughty Dog for the character and game graphics, along with the rest of Uncharted 3.
Now let's look at our Toolbox.
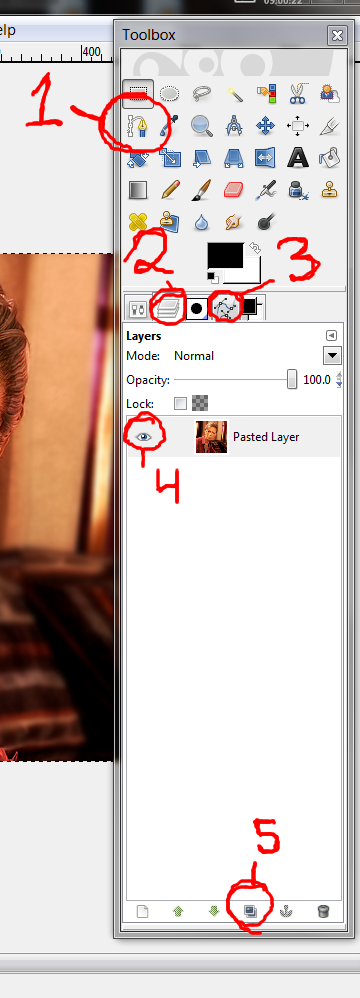
There are 5 objects labeled on that image.
1: This is the Pen tool, also called the Paths tool. It is the key to victory.
2: This is the layers tab. All of these little tabs do not appear by default - the only one that should be there by default is Tool Options. See that little arrow to the right side, the one pointing the left? On the image, the arrow is on the same row as the word "Layers". Click that, hover over the Add Tab option, and select Layers. Repeat the same procedure with Paths.
The Layers tab is important to setting up! It shows all of your current layers and allows you to do things with them. If there's one thing that puts MS Paint at the bottom of the stack of art programs, it's the program's inability to do layers.
3: This is the paths tab. I already explained how to get it. It shows all the paths you have currently created and lets you do things with them. We'll actually only need it briefly.
4: This little eyeball icon is a layer's visibility. Clicking on it will make the layer disappear! This is mostly only important for a back-up step of mine.
5: This is the duplicate layer button. It is also only necessary because of a back-up step.
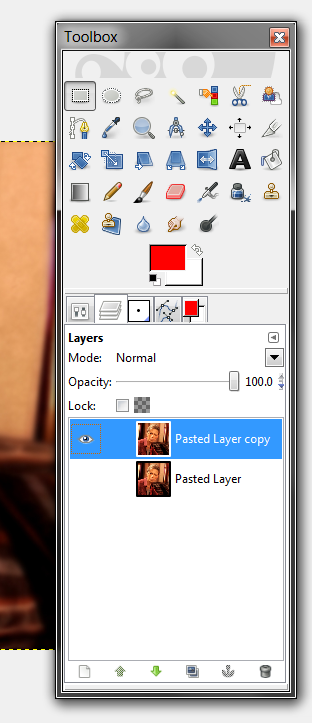
In fact, let's do that back-up step. Regardless of what I plan to do with an image I'm manipulating, I like to keep a copy of the original in case I need it for something. You could of course just save another copy, but this keeps it close, and it's really easy.
In the layers tab, select your one layer, click the duplicate layer button. You should now have two layers, exactly the same. Now, click the eye next to the layer on the bottom, making it invisible. When you're done, it should look like this:
Now is a good time to save. Now, you can't quite save as a flat image file yet - you want to keep all those lovely layers. GIMP has a native file type called .xcf. Save your image as whatever_you_want.xcf.
Here's an important note: you cannot upload .xcfs to the internet as images. It has no idea what to do with them. Only GIMP understands how to open .xcf files.
Let's teach how to use the Paths tool. Select it. No need to follow along with what I'm doing here though, this is a demonstration.
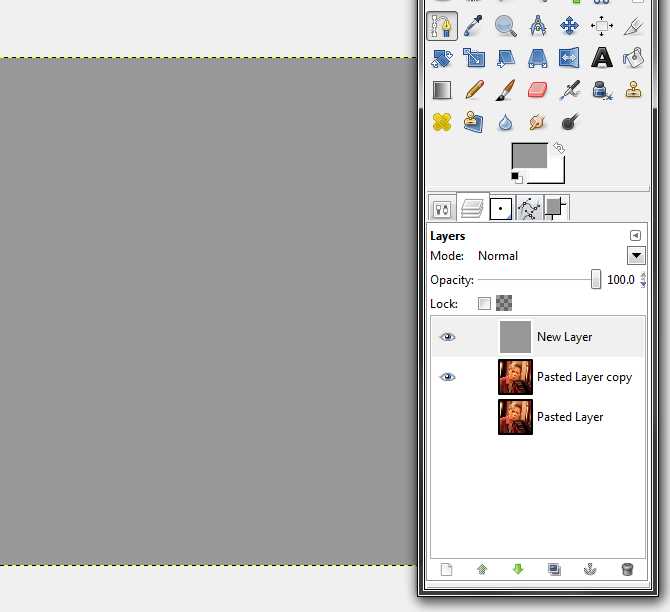
I've created an all-grey layer over Elena. Sorry Elena, we'll be seeing you again in a second!
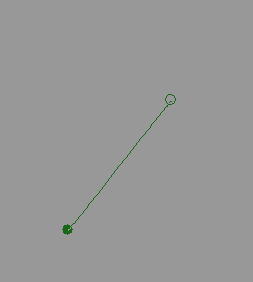
Here's the basics of how the Paths tool functions. When you click the first time, you create a point.
Like this.
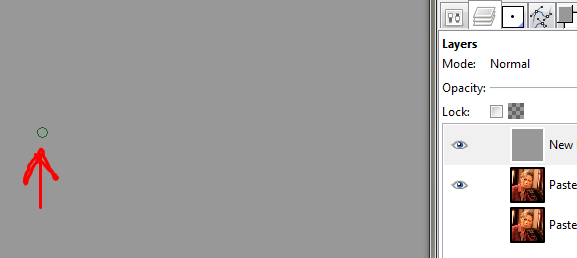
That's one point. Now I make a second point!
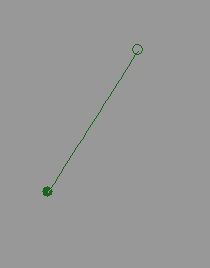
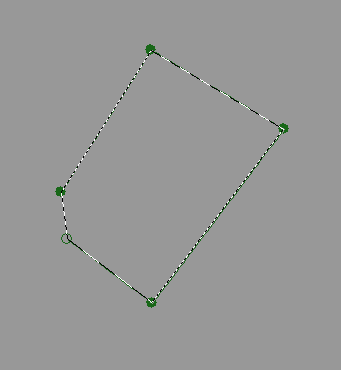
See how a straight "path" has been formed between them? Now I think I'll make a few more paths real quick... I'm going to be on the Paths tab now by the way.

Now I have a bunch of lines in this path. See that box that I'm pointing at with a red arrow? That's the Path-To-Selection tool. It creates a selection, running along the path, connection from the first point to the last point and acting as if there was one more line connecting the first and last points.
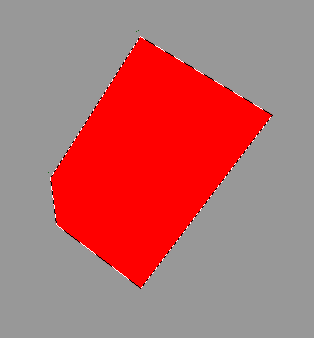
I clicked the button. The dotted line, which is animated in reality (I'm not high-quality enough to actually make a gif of it), indicates a selection. Until I end the selection, I can only effect inside the selection. I can do things like fill it with color:
Or, critically, I can DELETE everything I currently have selected by, uh, clicking the delete button on my keyboard:
Hello Elena! When I clicked Delete, what technically happens is everything I "deleted" is converted to transparency. Because my duplicated Elena layer is still marked as visible, when I delete parts of this top gray layer, the lower layer shows through. If I delete elements of that duplicate Elena layer though it will turn to actual transparency, because there is no visible layers beneath it.
Let's show off the reasons I like using the Paths tool though.
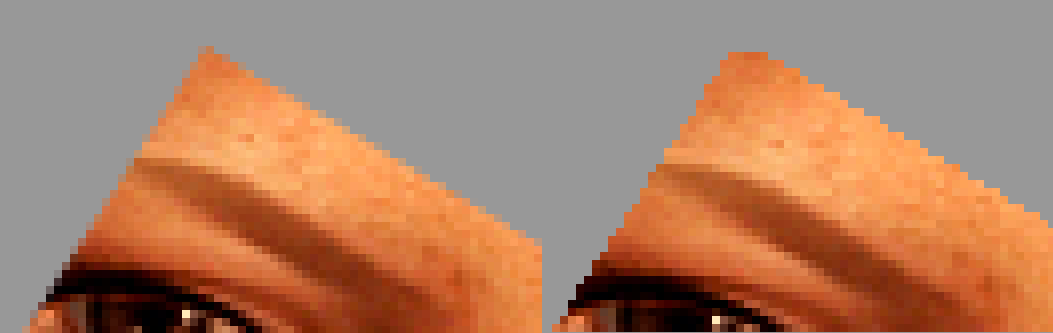
What's the difference between the left and the right? The left was done with the paths tool using the above technique, while the one on the right was done with just the regular old eraser tool in like 5 seconds.
If it isn't popping out at you, look at the edges. On the paths tool, it looks like they're blending together a bit! But they can't be, they're on different layers, they don't interact! This happens because the very edges of the Paths Selection doesn't fully turn to transparency. Instead, they leave the very edges in a state of PARTIAL transparency, allowing a bit of it to show through. This is why I like Paths, they make a super-smooth look. And because it's NOT blending but partial transparency, it means it will blend that way with anything you put under it.
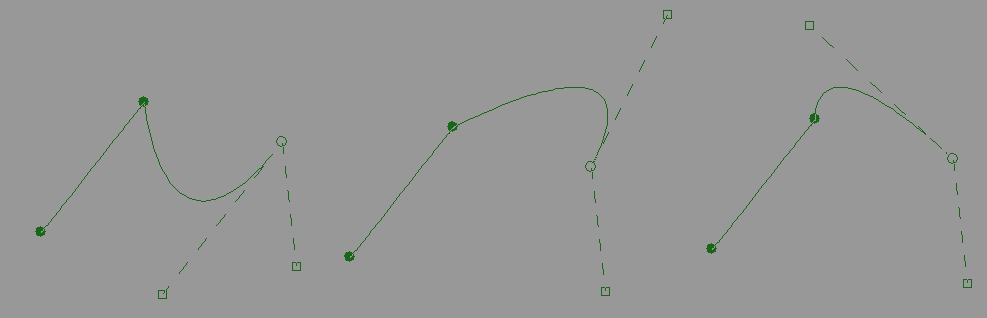
The other thing the Paths tool excels at is curves. Let's fill in the canvas with grey again and place two points just by clicking.
Now, I could place a third point the same way, but let's do something slightly different. Instead of just clicking, I'm going to click and hold it and then drag off to the side, THEN unpress.
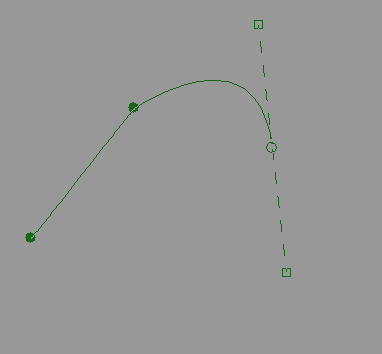
Woah! A curve. I pulled it downward, and where the little box on the bottom is is where I let go. The top box always moves in the exact opposite direction of where I move the mouse while holding it in that initial pull. Now I can click and drag that top box around to CHANGE the curve. Here's a couple.
So, that other box doesn't change. What is it for? It impacts the next curve in a sequence. Here, look at this:
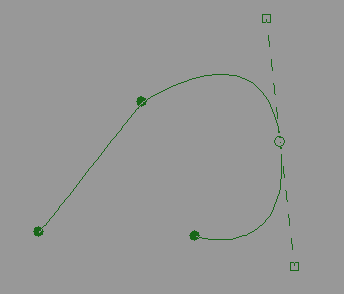
That's the original path (the first one there, all alone) when I made a new point. Important to know is that I did NOT hold and drag that one! If I had made that path off of, say, the first point, it would be straight. All the effect is from the bottom box, the previous curve informing this line. Let's move that bottom box around a little.
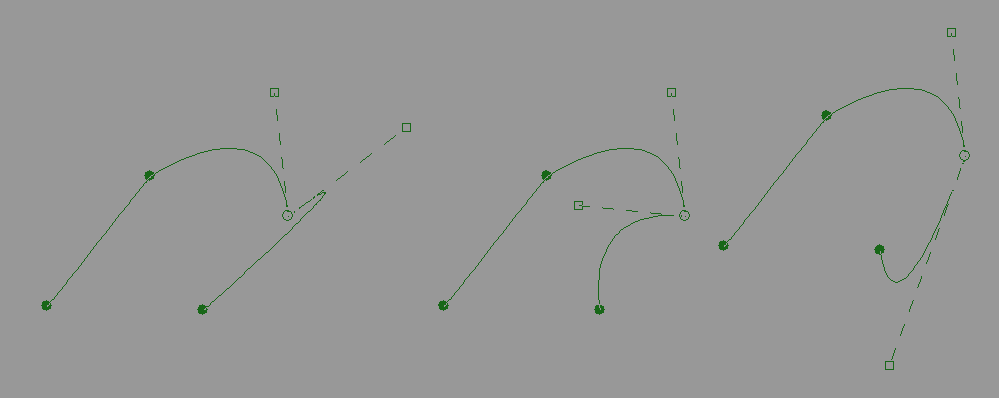
Moving it around only affects the next curve, not the previous one. So the two boxes let you influence the curves on either side of the point. Messing around with them gives you all sorts of control over your curves. Experiment a little to get a feel for it!
Now let's stop messing around in this grey layer. I'm gonna delete it and look at Elena some more.
Alright. So I'm going to zoom all the way in on the image and move over to where I'm starting, at the spot where her shoulder goes off the edge of the image. Make your first point at the very edge. Heck, maybe even put it a little over the edge of the image.
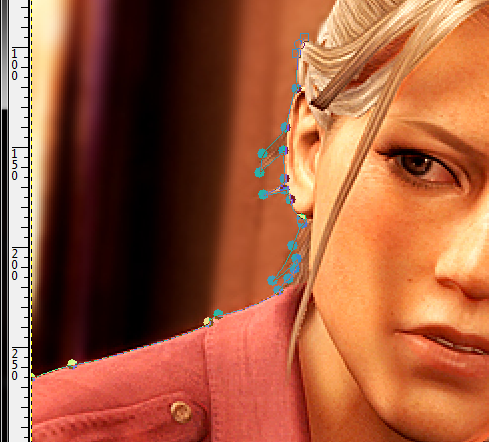
Here's me as I'm working along the side of her head, zoomed out a bit. Pull out those little boxes and move them around to make the curves match the image as you go, and know that whenever you want a sharp turn, take the box that affects the next curve and place it on top of the point - it won't have an impact. Don't worry about it being absolutely perfectly matching every little curve - too many little dips might be accuracte, but will cause a rougher line. I like to avoid having any straight lines if I can, I find they don't match well.
Hair is one of the hardest bits to do because of all the loose strands and layering and it's a complicated visual tangle. Use your best judgement to decide which bits to pick out. I'm serious, hair is one of the hardest parts of any render.
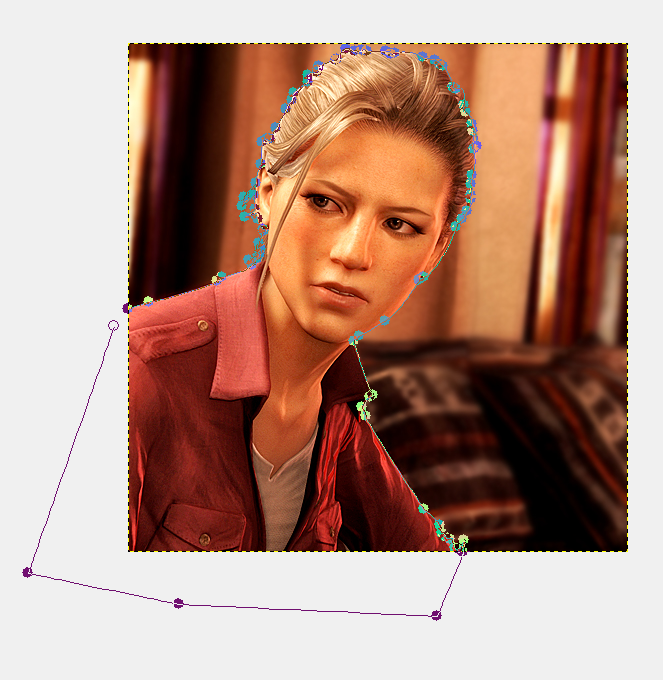
When I hit the edges I usually just go wide around it. They don't matter.
So select the image with that Path-To-Selection button! You might notice that we have a slight issue - if you hit the delete button, you delete Elena and leave the background! That's the opposite of what we want. And so, once Elena is selected, let's Invert the selection. You can do this by going to Select -> Invert, or by pressing Ctrl+I. Then hit delete.
I checked it over a whole bunch of backgrounds and it looks pretty good in them! Of course, this isn't perfect. I did it in 5 minutes after all. But it's passable, and it's not all messed up, and if it's shrunk down for an avatar or something it'll look great.
So let's talk about troubleshooting real quick.
Your go-to fix is Ctrl-Z or Edit -> Undo. GIMP's limit of undos is super high.
If you change your tool off of the Paths tool by accident, it looks like your path disappeared! But don't panic, it's not gone. Select your Paths tool again. Now go to the Paths Tab in your Toolbox, and you should see it there! Remember how those eyeballs mean visible? Well, your path is currently invisible. Click on the left of the path you want (if you get a chain, try a little further left). You should now see the line of the path on your image. If you click that line with the paths tool, your points should reappear. Just remember later to make the path invisible again or the image won't look right later.
And just as a bonus, I messed around with the colors of the final image. That scene in the game had HEAVY red and yellow lighting, I wanted to tone it down a little into a more toned-down image.

Colors like that, she could jump right in with her voice-actress sister over in Haven. (I love you Emily Rose)
Hope you learned something. It takes some practice, but this is a pretty strong technique for extracting stuff due to the versatile shapes of paths and their sharp-yet-smooth edges. I make most of my digital art with paths these days.
Later folks.
End Recording,
Ego.
No comments :
Post a Comment